Home Assistant often serves as the “brain” of our home, controlling everything from lighting to security systems. Despite its reliability, the software runs on hardware (such as SD cards or SSDs) that can fail. A single misconfiguration or failed update can also result in the loss of months of work on automations and dashboards.
Using a QNAP NAS as a backup destination is one of the best solutions. Instead of storing your backups on the same device that runs Home Assistant, you send them to an external server with disk redundancy (RAID). That way, even if your Home Assistant computer crashes, your smart home can be restored in a matter of minutes.
The QNAP NAS can also be replaced with any network-attached storage device that supports data sharing via the SMB protocol.
How to set it up: Step by step
The process is divided into setting up network sharing and configuring the Home Assistant system itself.
Setting up a QNAP NAS
Before Home Assistant can save files, you need to set up a “storage location” for it on your network.
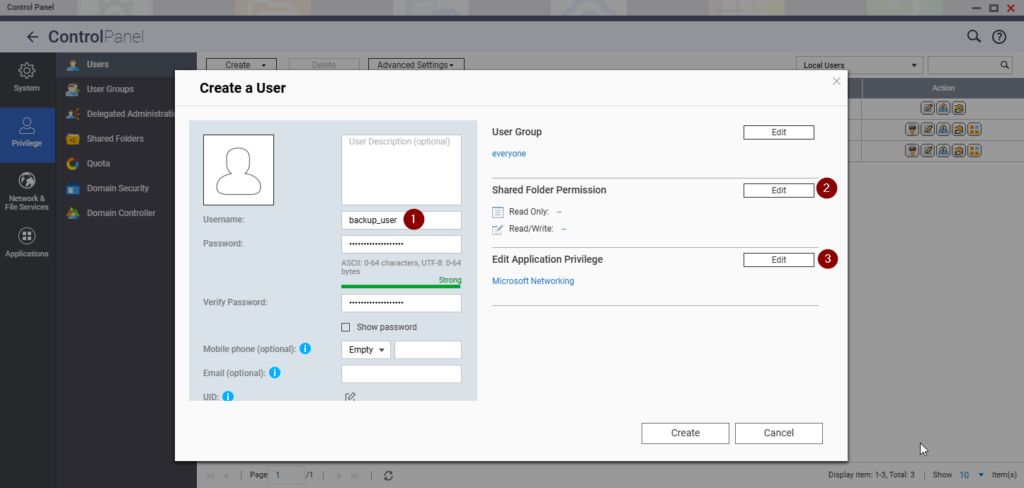
User access: Create a new user (e.g., backup_user) with a specific password.
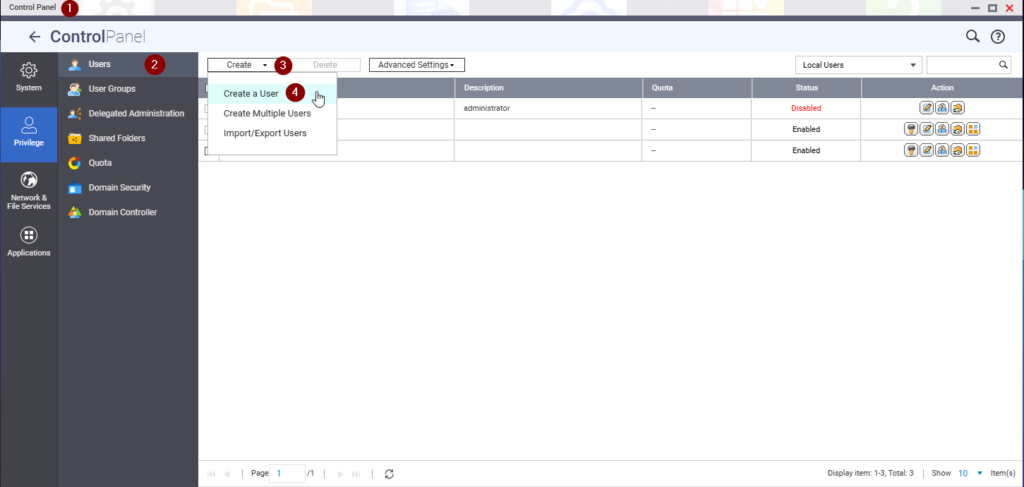
You can do this by going to the Control Panel ControlPanel > Users (1 and 2) and creating a new user by clicking “Create” and then “Create a user” (3 and 4)
Enter the user name (1). Be sure to use a strong password; this is important for security. Remove access to the public folder (2) and restrict the user’s permissions to “Microsoft Networking” (3).
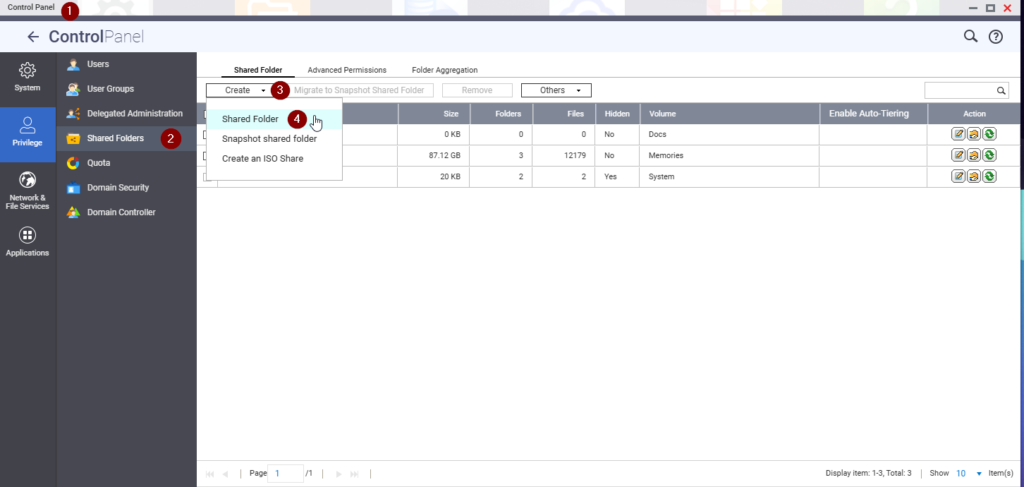
Creating a folder: Log in to QTS (the QNAP interface), open File Station or Control Panel > Shared Folders(1 and 2), and create a new folder, such as “HA_Backups,” from the “Create” and “Shared Folder” menus (3 and 4).
Enter the name (1) and finish creating it (2).

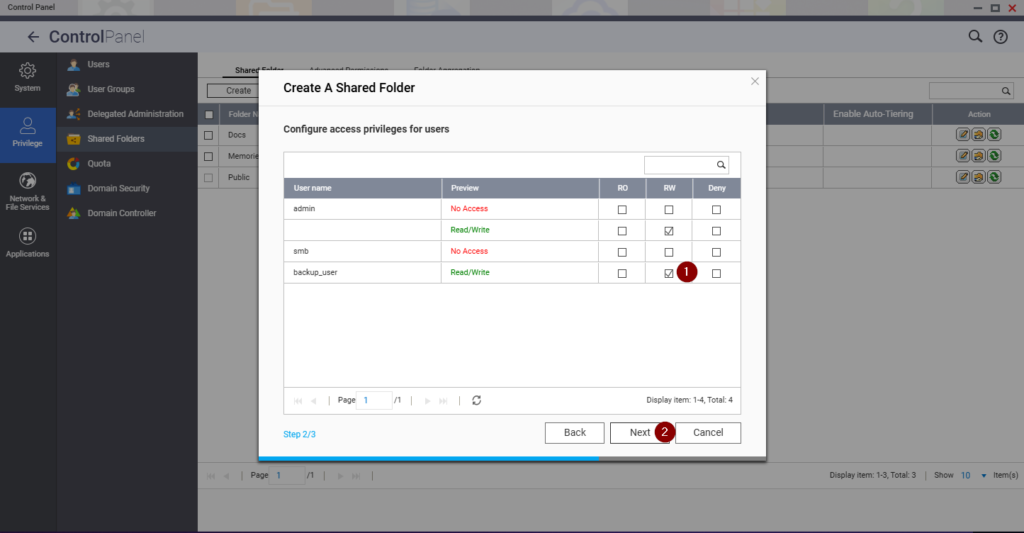
Grant the user write permissions for the “HA_Backups” folder (1), and you may also grant the standard user write permissions for it. Then click the “Next” button (2).
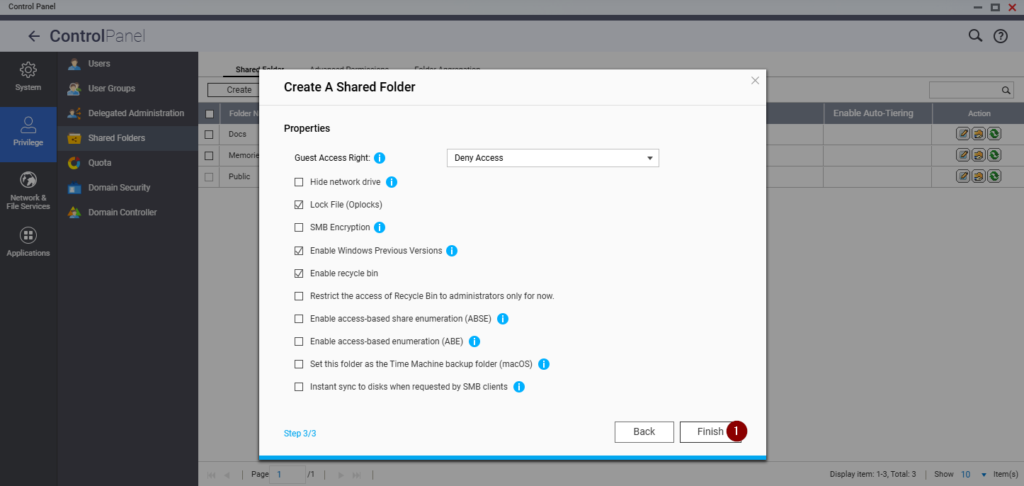
Then simply click “Finish” (1) to complete the process without changing the selected settings.
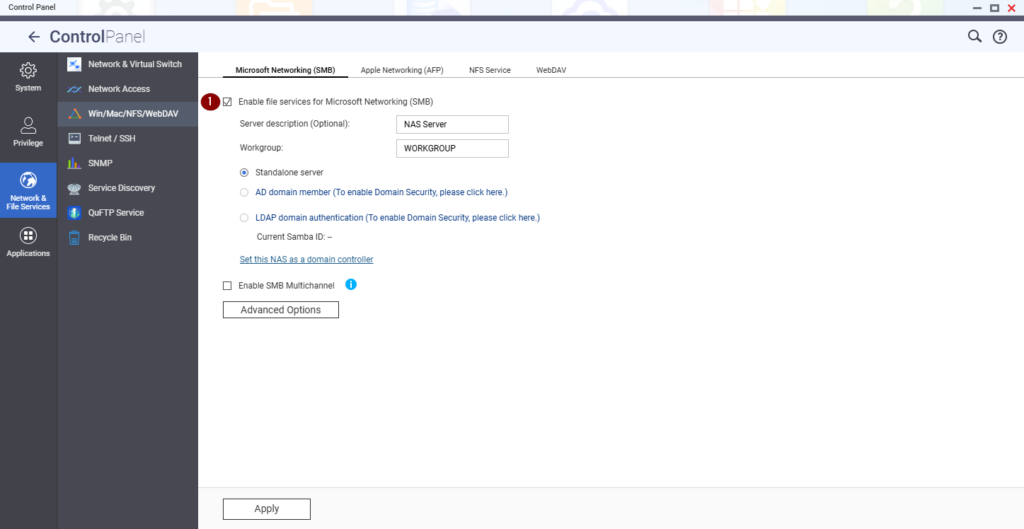
Enabling SMB: Make sure that the Microsoft Networking (SMB) protocol is enabled in the Network Services settings (1).
Connecting Home Assistant to a NAS
Starting with version 2023.6, Home Assistant supports mounting network drives directly through its interface.
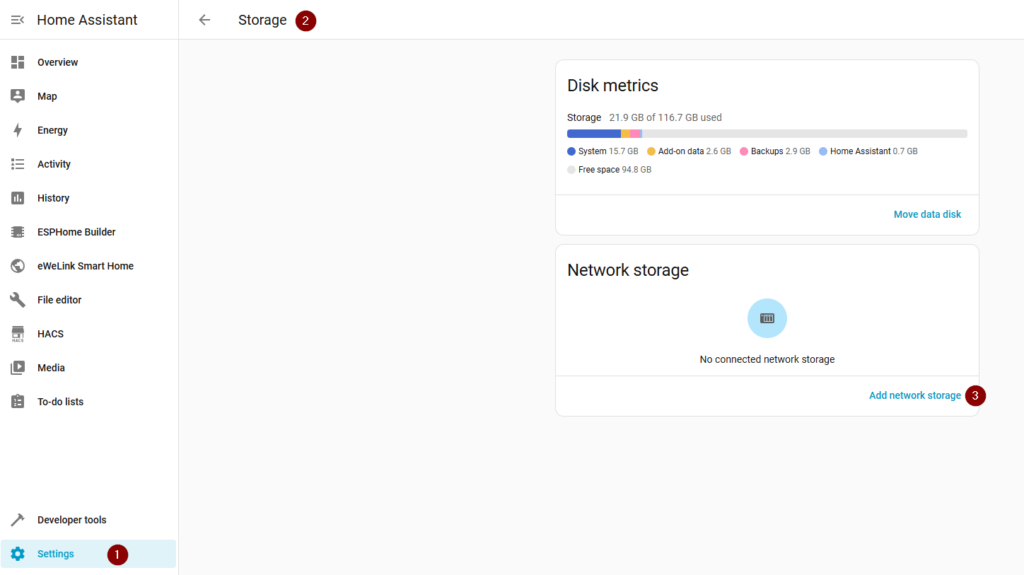
Go to Settings(1) > System > Storage(2) and tap the Add Network Storage button(3).
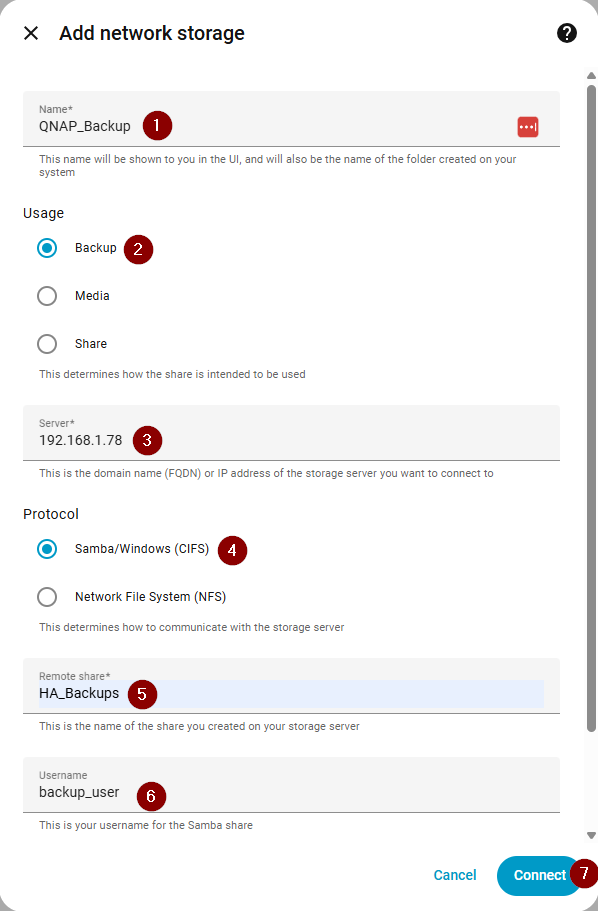
- Please fill in the information:
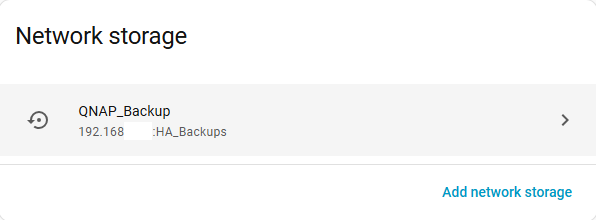
- Name: QNAP_Backup (1)
- Usage: Select Backup. (2)
- Server: The IP address of your QNAP, e.g., “192.168.1.78”. (3)
- Protocol: Samba/SMB. (4)
- Share: The name of the “HA_Backups” folder. (5)
- Login credentials: The username and password you created in Step 1. (6)
Click “Connect” (7) If the window closes, the connection was successful.
The finished connection should look like this.
Set up an automatic schedule
Now you need to tell the system how often to create these backups.
Go to Settings (1) > System > Backups (2), and select “Automatic backups” (3)

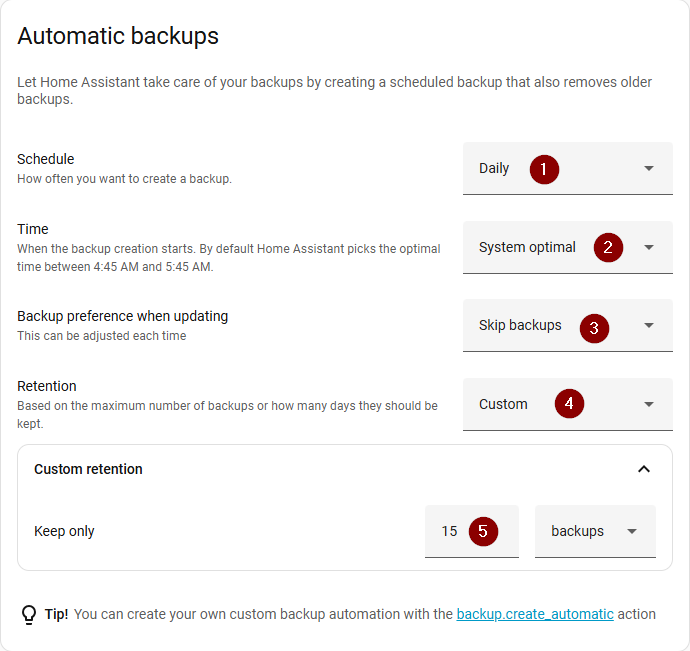
In this case, we will select Schedule: Daily (1), Time: System optimal (2), Backup preference when updating: Skip backups (3), and Retention: Custom (4), Keep only 15 backups (5).
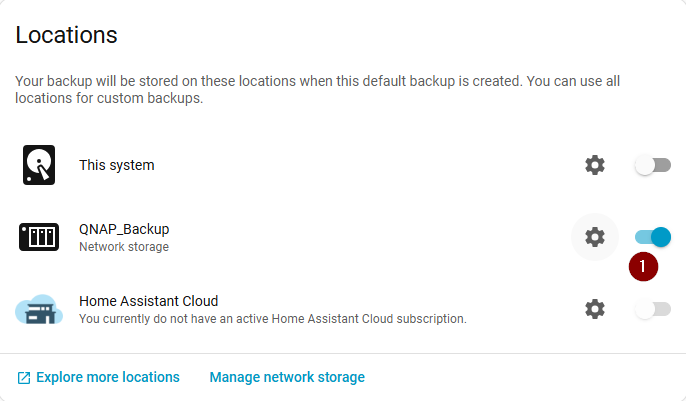
The other settings, such as the “Backup data” menu, “Add-on update backups,” and “Encryption key,” can remain unchanged. Only under “Locations” should you select the network storage “QNAP_Backup” (1).
If we select the gear icon, there is an option to disable encryption, but this is not recommended from a security standpoint. Why do we need encryption?
Important: Encryption key
When a backup is first created, an encryption key is also generated. In Home Assistant (HA), starting with version 2025.1, a new system for automatic backups was introduced. In this context, the Encryptionkey is a password that protects your entire system archive.
This isn’t just a password for access; it’s a mathematical key used to encrypt all your data, passwords, tokens, and history before they are saved to the backup file (.tar).
What do you need to know about this key?
It’s your “Emergency Kit”
When you enable automatic backups for the first time, Home Assistant automatically generates this key and prompts you to download your Emergency Kit. This is a small text file that contains the key.
Important: You should store this key in a secure location (such as a password manager like Bitwarden or on a piece of paper), separate from your Home Assistant server.
Why is it necessary?
All backups are now encrypted by default (AES-128) to ensure that if someone steals your file from the cloud (such as Google Drive), they won’t be able to access your Wi-Fi network passwords or smart lock codes.
When will you need it?
- For a full restore: If your SD card or SSD fails and you perform a clean install of Home Assistant, the system will ask you for this key so it can “decrypt” the backup and restore it.
- When opening manually: If you download the backup via Samba or SSH, it will be encrypted, and you won’t be able to open it with a standard program like WinRAR or 7-Zip without this key.
Where is the key right now?
If you didn’t write down your key during the initial setup, you can find it here:
Go to Settings (1) > System > Backups> Backup settings. (2) > Automatic backups > Encryption key
Look for the option Show my encryption key (3) or Download emergency kit (4).

What happens if you lose it?
If your system is working, you can simply generate a new key. But if your system crashes and you don’t have the key, your backups become unusable. Neither you nor the Home Assistant developers can decrypt them without it.
Conclusion
Setting up an automatic backup to a QNAP NAS is a critical step for any serious Home Assistant user. This method not only automates the tedious process of manually downloading files, but also ensures that your data is stored in a secure, remote location on your local network.
Once you’ve finished configuring the settings, take a minute to perform a test backup and check whether the file has appeared in your QNAP folder. The best backup is the one you don’t have to think about, but know is always there when you need it.
Check the status of your QNAP drives periodically to ensure that the hardware storing your data is in good working order.
Happy coding!