In this article, we’ll take a look at the ESP8266 board and how we can program it using the Visual Studio Code integrated programming environment and PlatformIO’s add-in for programming small single-board computers in Windows. We’ll look at the installation of the environment and run a sample program on the board to test it. A more detailed description of the installation process can be found in this article here. Let’s get started.
What is the Visual Studio Code
Visual Studio Code (VS Code) is a free, lightweight and powerful text editor that was developed by Microsoft. It is designed for software development and supports various programming languages like JavaScript, Python, C++, Java, and many more. One of the most important aspects of VS Code is its flexibility and rich ecosystem of extensions, which makes it suitable for different types of development – web development, mobile app development, cloud apps, and more.
Some of the main features of Visual Studio Code include:
- Extensibility: the ability to add extensions that add new functionality and improve performance.
- Code intelligence: supports code autocompletion, code parsing, syntax error highlighting and other intelligent features.
- Integration with Git: Built-in support for version control with Git, allowing convenient change management in code.
- Debugger: Allows debugging of code, providing debugging tools, step-by-step execution, and a view of variable values.
- Integration with various cloud services and platforms: support for development and integration with cloud services such as Azure, AWS, Google Cloud and others.
- Work Environment Configuration:Users can customize their work environment through themes, extensions and settings tailored to their needs and preferences.
Visual Studio Code is popular among programmers because of its speed, flexibility, and the large amount of extensions available to make the programming process more productive. In order to use it when programming microcontrollers and boards, we also need to install the PlatformIO extension.
What is PlatformIO
PlatformIO is an integrated development environment (IDE) for microcontrollers that focuses on platforms such as Arduino, ESP8266, ESP32, STM32 and many others. It allows programmers to develop software for microcontrollers more easily and efficiently.
Here are some of the main features of PlatformIO:
- Multi-platform development: PlatformIO supports many different microcontroller platforms, such as Arduino, ESP8266, ESP32, STM32, AVR, Raspberry Pi, etc.
- Integration with various IDEs: PlatformIO is available as an extension for popular development environments such as Visual Studio Code, Atom, Sublime Text and Eclipse. This allows users to choose their favorite development environment.
- Library management:PlatformIO offers a convenient way to manage libraries from different sources. Users can easily add and use libraries for their projects.
- Project Management:The platform provides a convenient way to create and manage projects for different microcontroller platforms.
- Integrated Debug Interface:PlatformIO provides a built-in debug interface that allows programmers to debug their programs directly from the IDE.
- Extensive build tools and memory map: PlatformIO provides tools to manage program builds, as well as a graphical interface to visualize the memory used by programs.
PlatformIO is very popular among programmers working with microcontrollers because of its flexibility, rich features and good integration with popular development environments.
Installation on Visual Studio Code and PlatformIO
Before installing the environments, we need to download them. Let’s start with VS Code. The environment can be downloaded from here. After downloading it, let’s install it. For a normal Windows installation, we need to select Windows
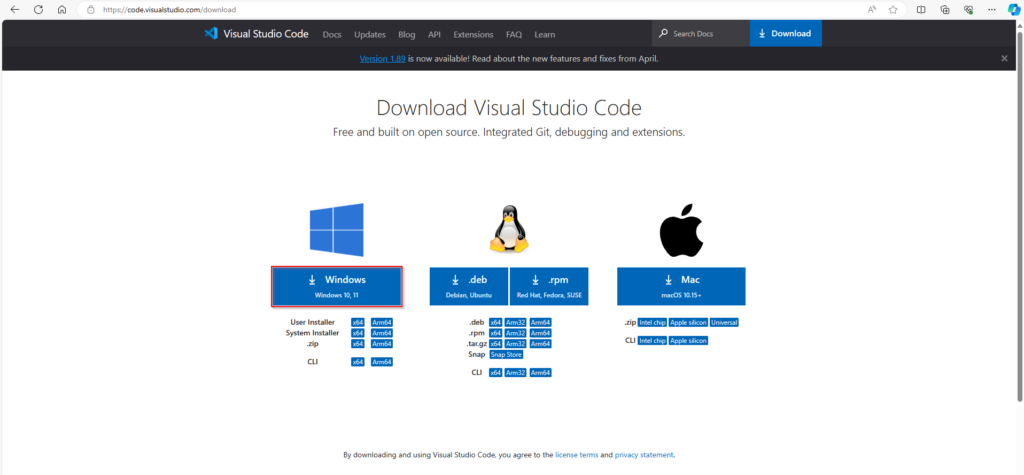
Let’s click on the link, download the application and run the installation file:
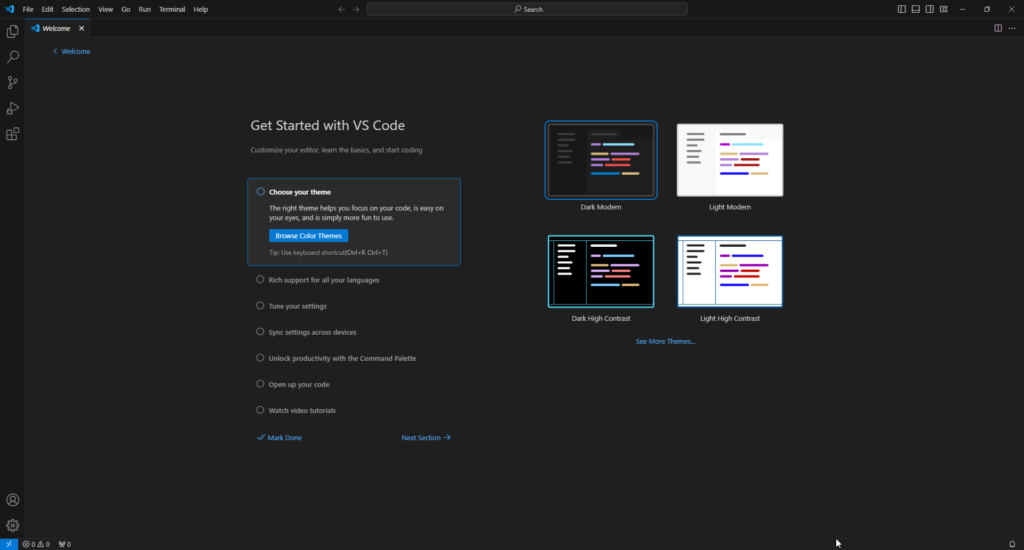
Once we install it and press “Finish”, the environment will launch and open. This is what it looks like.
Now that we are done with the VS Code installation, let’s continue with PlatformIO.
We can download PlatformIO by opening the Extensions tab of VS Code, searching for “PlatformIO” and installing it.
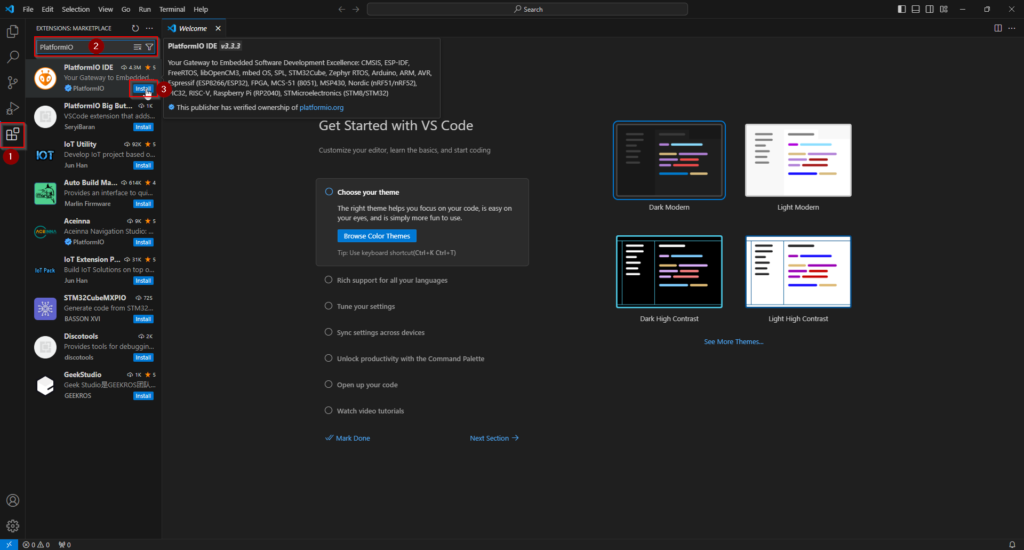
Once we click Install, we will guide the progress of the installation.
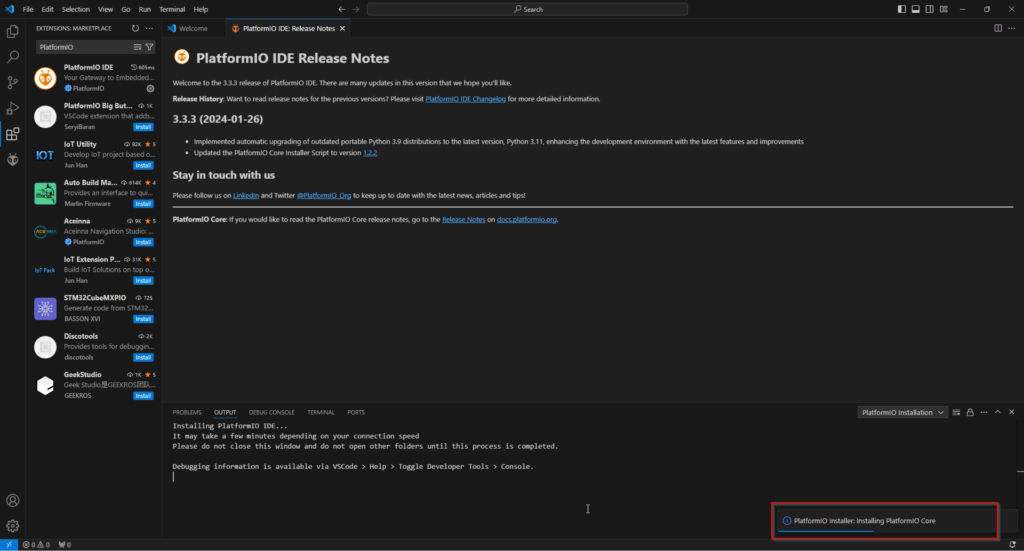
The installation takes a few minutes and then we have to restart the integrated programming environment.
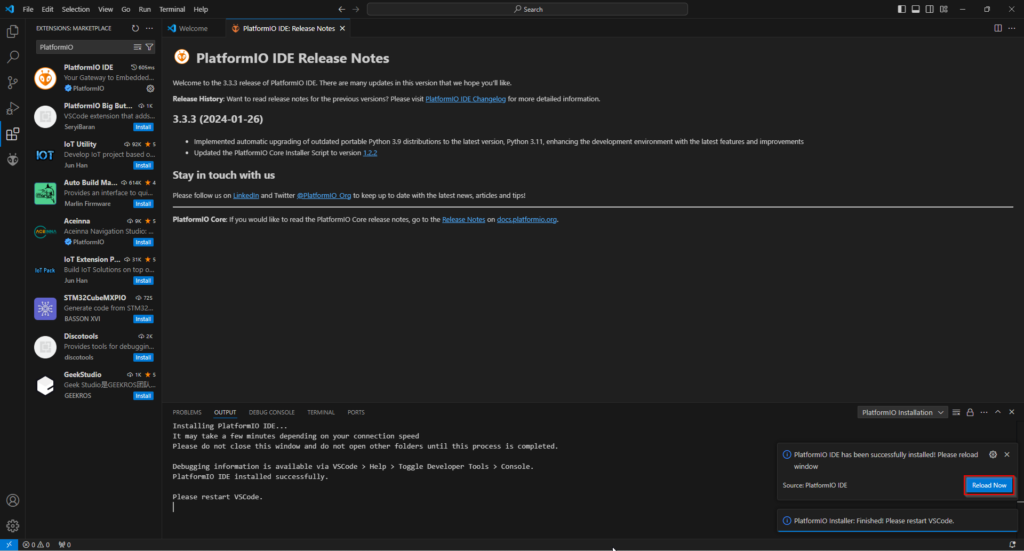
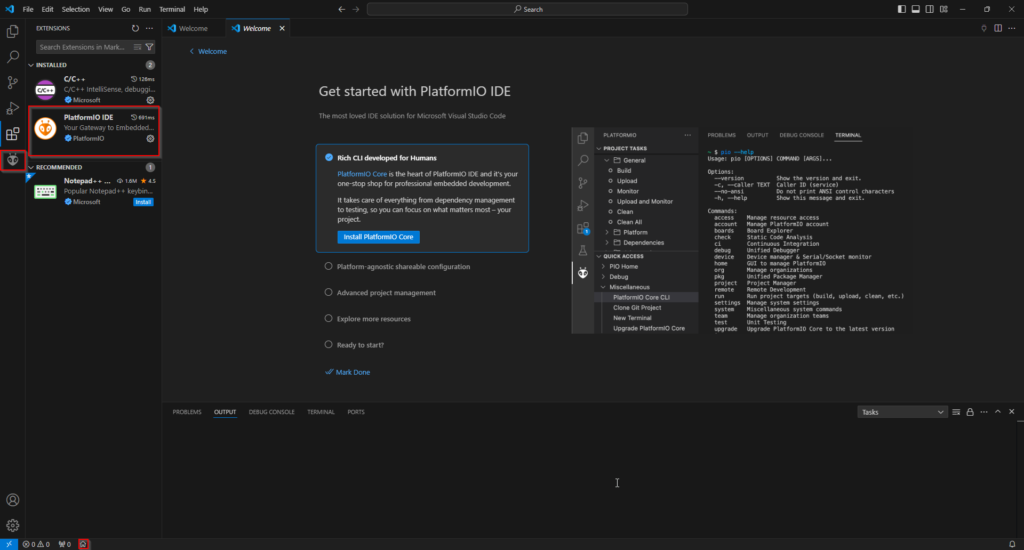
Once we do this, we will see that the installation was successful and we can use PlatformIO. It can be launched with the icon on the left of the menu under Extensions or from the house icon on the bottom menu.
Python installation
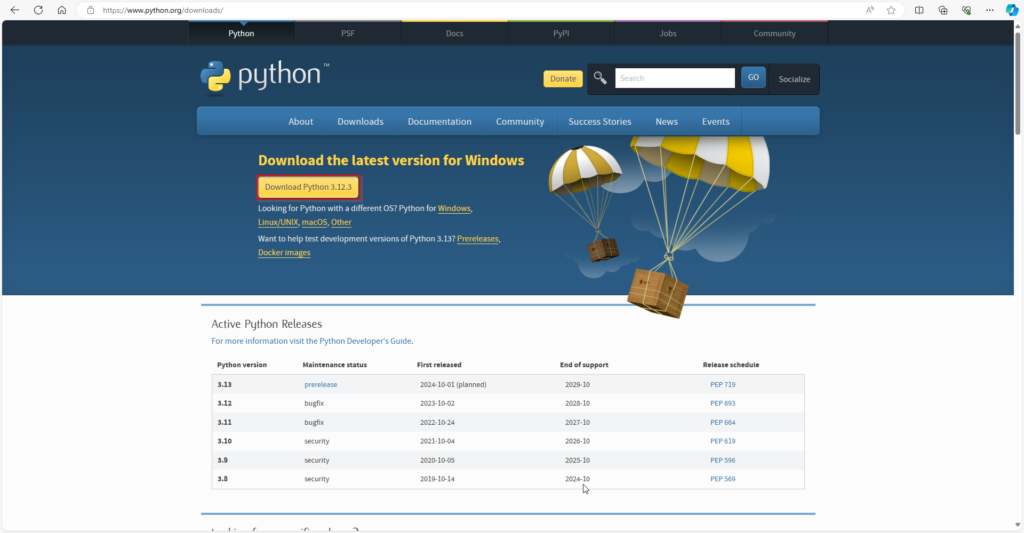
To program the ESP8266 board with the PlatformIO IDE, you must have Python 3.5 or later installed. For this example, we will use Python 3.12.3. Let’s go here and download Python 3.12.3 or the latest version.
Once downloaded, let’s run the installation and install the application. It is important during installation to select the options “Add python.exe to PATH ” and “Use admin privileges when installing py.exe”, as well as agree to Windows installing Python with administrator privileges.
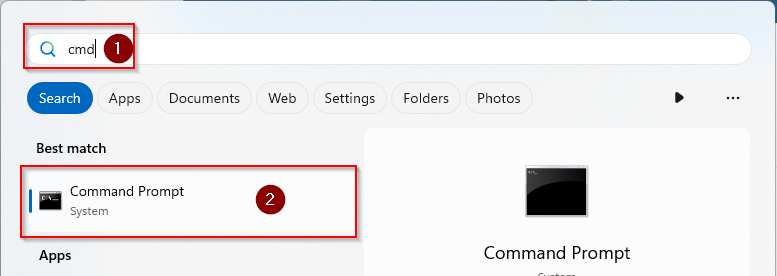
Once we are done with the installation, we can test if Python is installed. To do this, we need to open the Windows command console.
We can do this by opening the Windows start menu and typing cmd.
And then in it we write
>python –V
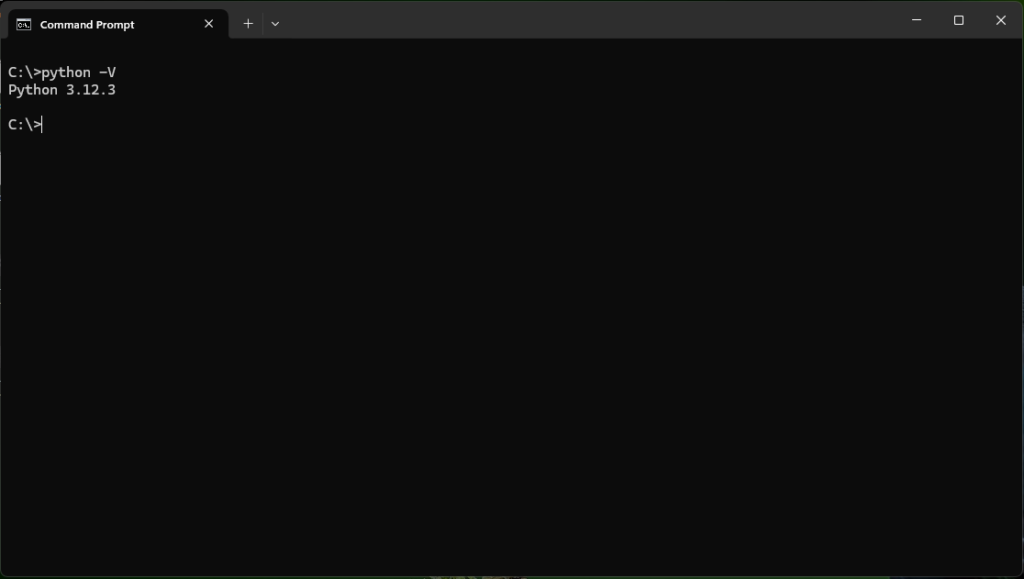
If we see the correct version, then Python is installed.
What is ESP8266
The ESP8266 is a small, low-power microcontroller that is extremely popular in the Internet of Things (IoT) field. It integrates Wi-Fi capabilities and a powerful microcontroller, thus allowing devices such as microcontrollers, microcomputers, sensors and other electronic devices to communicate wirelessly with the Internet. The ESP8266 was developed by the Chinese company Espressif Systems and features its low cost, low power consumption and ease of use. This module is very useful for projects that require internet connectivity, such as smart homes, sensor monitoring and control, IoT data collection devices and the like.
A detailed description of the board can be found on this page. Also a detailed description of the chip itself can be found on the manufacturer’s page, which is here.
But let’s write some code.
Programming the ESP8266 with PlatformIO
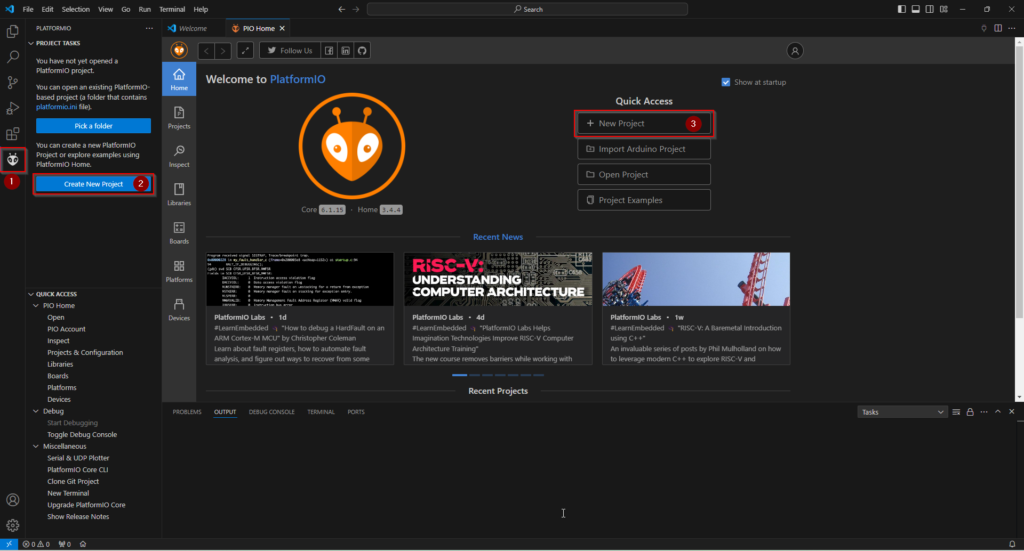
Let’s create a new project in PlatformIO. We can do this by selecting the PlatformIO tab on the left, then selecting “Create New Project” and then “New Project”.
After selecting “New Project”, we can configure the project as follows:
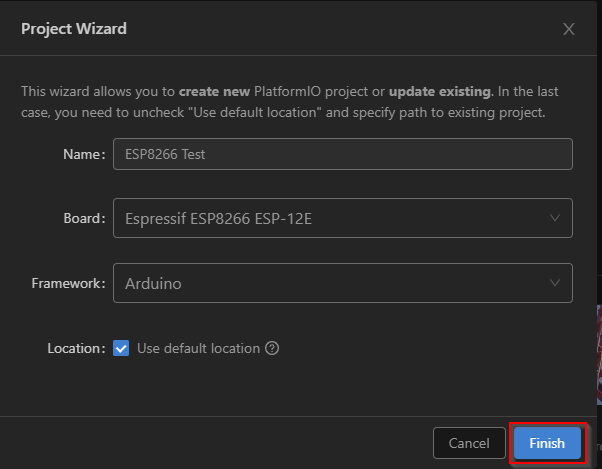
And press “Finish”
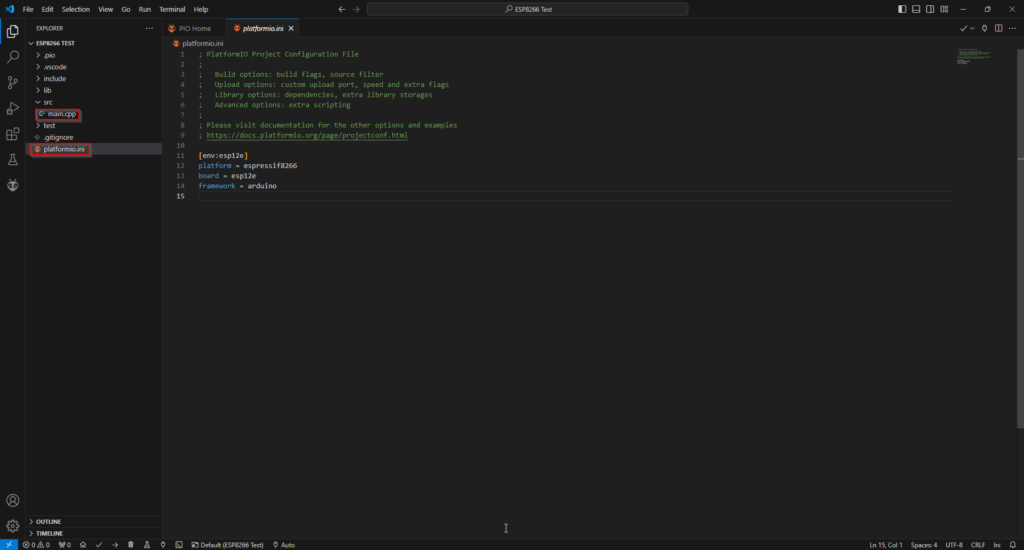
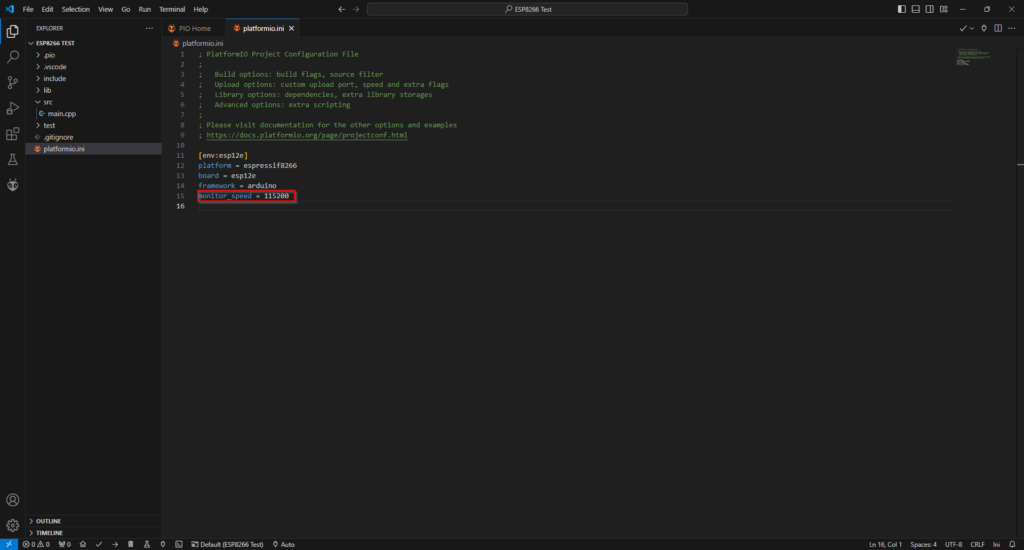
Creating the project takes a few minutes. Once created, you can see the project’s file structure. There are quite a few files in it, but we will only need a few of them. The main file for the project is “platformio.ini”. It contains information about the project and the board settings we are using. Another important part of the project is the “main.cpp” file, which is in the src folder. In it we need to write the code we want to run on the microchip.
If we want to define a baud rate to the serial monitor, we just need to add the following line in the platformio.ini file.
monitor_speed = 115200 like this.
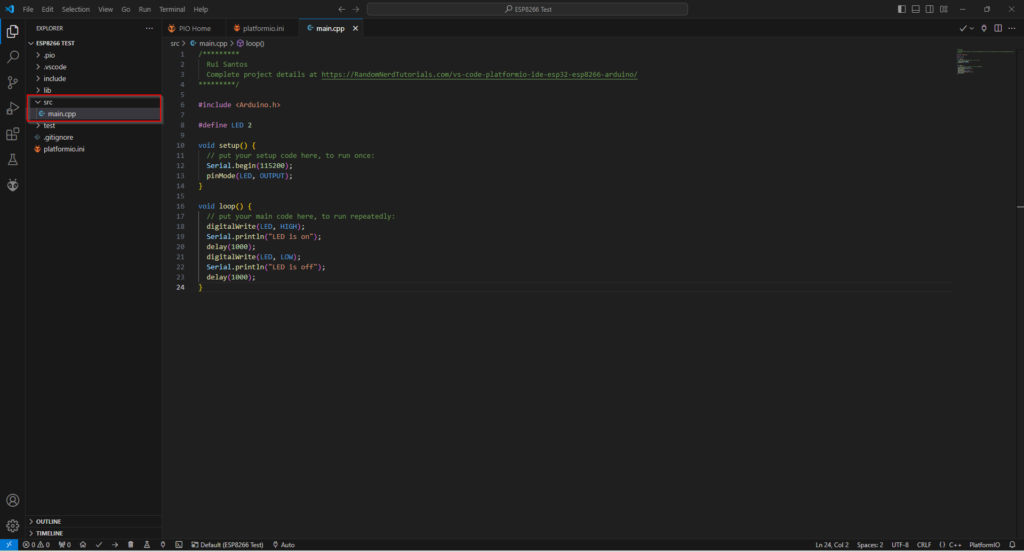
Let’s now add the following code to the file we talked about above “main.cpp”. It is taken from this page.
/*********
  Rui Santos
  Complete project details at https://RandomNerdTutorials.com/vs-code-platformio-ide-esp32-esp8266-arduino/
*********/

#include <Arduino.h>
#define LED 2

void setup() {
  // put your setup code here, to run once:
  Serial.begin(115200);
  pinMode(LED, OUTPUT);
}

void loop() {
  // put your main code here, to run repeatedly:
  digitalWrite(LED, HIGH);
  Serial.println("LED is on");
  delay(1000);
  digitalWrite(LED, LOW);
  Serial.println("LED is off");
  delay(1000);
}
The code causes the ice on the board to flash at 1 second intervals. This is what the code looks like in the integrated environment.
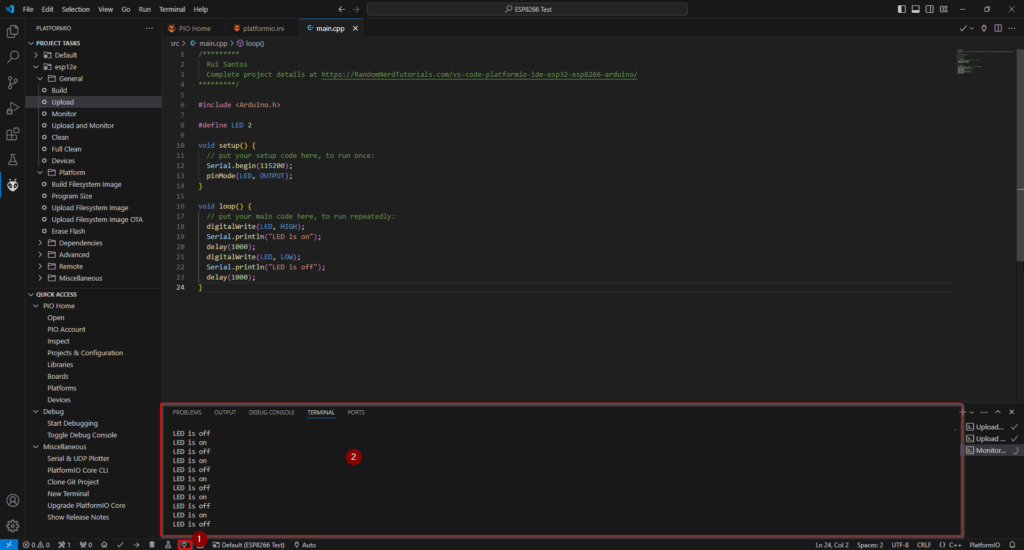
In order to execute the code on the ESP8266 board, we need to upload it. We can do this from the Project Tasks->General->Upload menu or from the arrow button at the bottom of the programming environment.

After choosing one of the two ways (the arrow button or the Upload menu), in the window on the bottom left we will see that the code has been uploaded to the ESP8266 chip and executed. We can look at the board and see that its ice flashes at regular 1 second intervals. We can also see this from the serial monitor by running it from the button down at the bottom of the program that looks like a plug.
A pretty good description of the VS Code GUI can be found on the official here. There we can find out what features the menus, different buttons and views of the integrated programming environment have. For more information about PlatformIO features, we can visit their here page. There we can find a description of the different buttons and features of the interface, as well as ways to profile and analyze resources on the board.
Conclusion
In this article we have seen how to program an ESP8266 board using the Arduino IDE alternative, PlatformIO integrated programming environment. PlatformIO can be used for other microprocessors such as ESP32 and others. It is lightweight and offers quite a lot of features like being a Debugger and a much more intuitive user interface. PlatformIO is a pretty good alternative to the Arduino IDE and even better in some ways.
Happy coding!